Benchling
Configuring Lab Atlas to use the Benchling ELN.
Lab Atlas can connect with Benchling to help you streamline your lab notebook workflows. By connecting your tenant and associating Benchling projects with Lab Atlas projects, you can automatically generate notebook folders and entries every time you create a Study or Assay in Lab Atlas.
Preparing Benchling
Lab Atlas integrates with Benchling using the ‘Apps’ feature, which allows access to the REST API without the need for providing user credentials. Instead, an App is registered within Benchling and assigned to each project Lab Atlas needs access to, with the appropriate permissions. If you have already added the Lab Atlas app to your tenant, skip to the next section.
Registering a Lab Atlas App in your Benchling tenant
Sign into your Benchling tenant with a user that has admin privileges and access to the Developer Console. The Developer Console can be accessed by clicking your user icon n the bottom-left of the screen, selecting Feature Settings, and then clicking 'Developer Console'.

Select the 'Apps' option from the Developer Console menu and then click 'Create App'. On the new screen that pops-up, select to create a new app 'From scratch'. Provide a name and brief description. Select 'Private' as the audience.

Once created, you will be redirected tothe app's details page. On the overview tab, click the + button to create a new Client Secret. Save that and the Client ID value in a safe place. These values will be entered into Lab Atlas when connecting your tenant.

Click on the 'Version History' tab. You should only see a single version of the app that you just created. Click the 'Install' button and then confirm the installation in the pop-up to install the app in your tenant.

Adding the Lab Atlas App to projects
Once your Lab Atlas App is installed in your Benchling tenant, you can begin associating it with organizations and projects you'd like it to have access to. Go the the Tenant Admin console in Benchling. If you click on the 'Apps' tab here, you should see the Lab Atlas app, along with any other apps you have installed in your tenant. Click 'Organizations' and then click the name of the first organization you'd like to add Lab Atlas to.
In the new organization window, click the 'Apps' tab. You'll notice that the Lab Atlas app does not yet show up here. Click the 'Search for an app' bar and search for the app you created. Once you select the app, it will be added to your organization. Make sure the Role value is set to 'Member'.

Next, you need to add the app to each project you would like to connect. In the Organization window, click the 'Projects' tab. Click the ⚙️ icon next to a project to open the Project Settings window. Click 'Manage Access'. In the new window, click the search bar and search for your app. Select it, set the permissions to 'Write', then click 'Add'. Click the 'Save' button on the window to close it and save you changes. Repeat this step for each additional project you'd like to allow Lab Atlas access to.

Connecting Lab Atlas to your Benchling Tenant
Once you have created your App in Benchling and assigned it to all of the relevant projects, you need to link it with your Lab Atlas organization. In Lab Atlas, open up the Admin Dashboard and go to the Integrations menu. Select 'Benchling'.

Click the 'Add Registration' button to open up the 'New Benchling Registration' dialog. Fill in the following information:
A display name for the connection (eg. your Benchling organization name).
The Benchling tenant name. This matches the subdomain of your Benchling tenant URL. So for example, if your organization's Benchling URL is
https://company-x.benchling.com, then the tenant name iscompany-x.The Client ID of the app you created in Benchling.
The Client Secret of the app you created in Benchling.

After you click 'Submit', Lab Atlas will test that it is able to connect to your Benchling tenant and read from it. If successful, you will be taken back to the Benchling integration overview page and your new connection will be visible.

Adding Benchling Projects to Lab Atlas
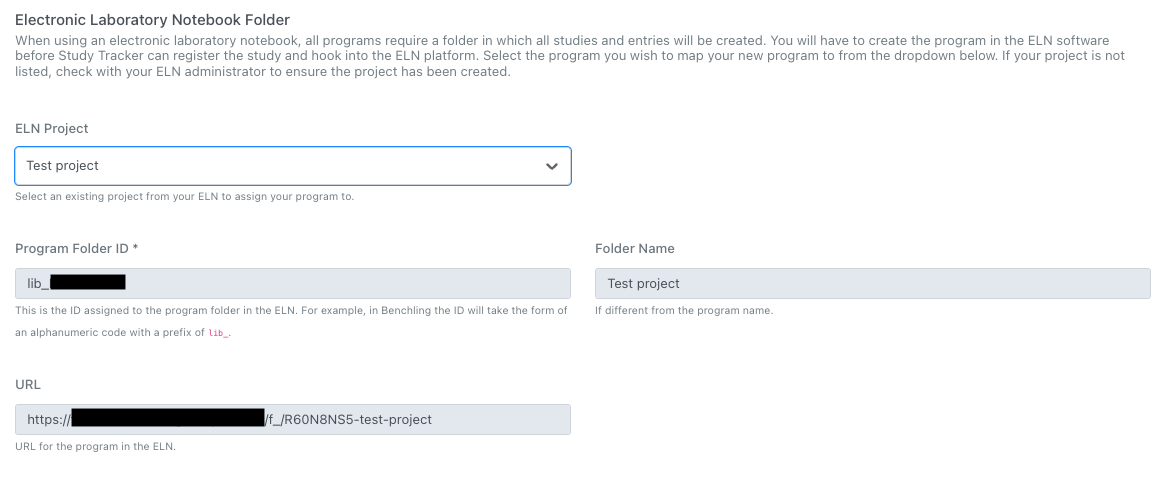
You can associate Benchling projects with Lab Atlas projects when creating them. Fill in the New Project form information as normal, then at the bottom of the page, under the 'Electronic Laboratory Notebook Folder' section, select your Benchling project from the 'ELN Projects' dropdown. This will fill in the appropriate information to allow Lab Atlas to connect to your Benchling project when creating studies.

Last updated